How to Register for GST India Online
In this article, we shall discuss the basic process for GST Registration. Every dealer whose annual turnover exceeds Rs 20 lakh (Rs 40 lakh or Rs 10 lakh, as it may vary depending upon state and kind of supplies) has to register for GST.
Step-by-step Guide for GST Registration:
Step 1: Go to GST portal. Click on Services. Then, click on ‘Registration’ tab and thereafter, select ‘New Registration’.

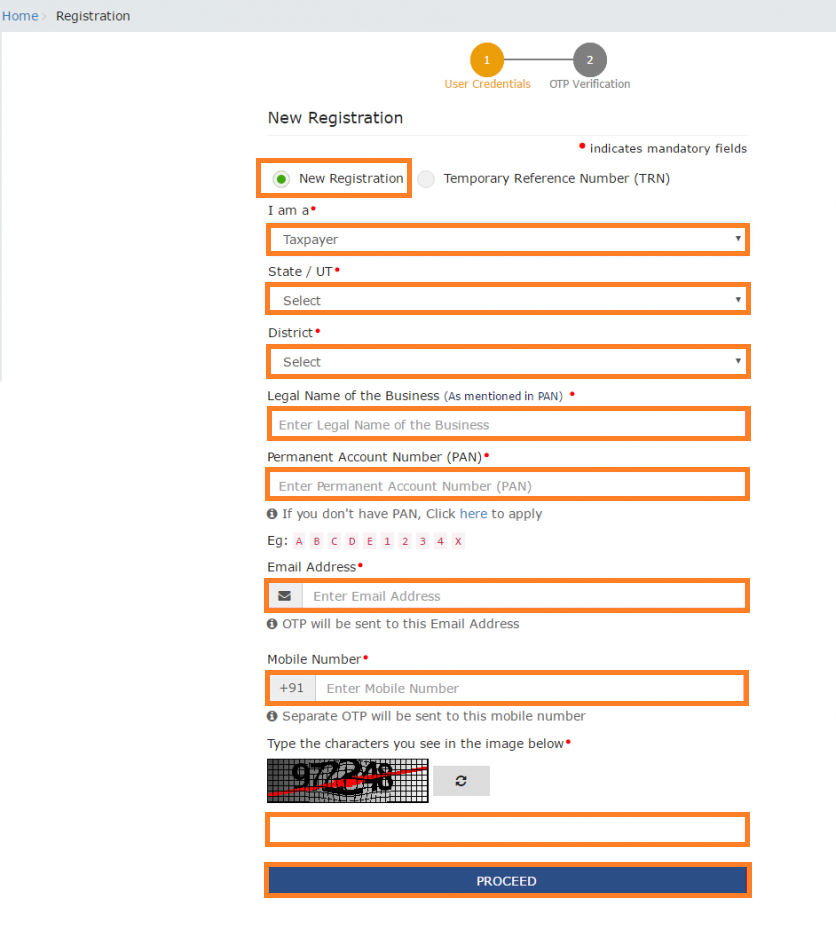
Step 2: Enter the following details in Part A:
- Select New Registration radio button
- In the drop-down under ‘I am a’ – select Taxpayer
- Select State and District from the drop down
- Enter the Name of Business and PAN of the business
- Key in the Email Address and Mobile Number. The registered email id and mobile number will receive the OTPs.
- Click on Proceed
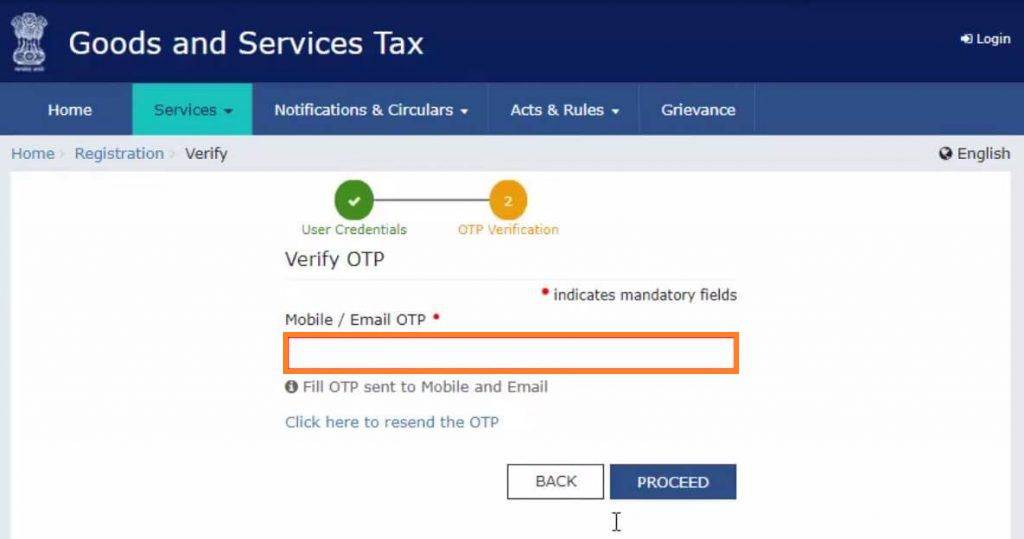
Step 3: Enter the two OTPs received on the email and mobile. Click on Continue. If you have not received the OTP click on Resend OTP.

Step 4: You will receive the 15-digit Temporary Reference Number (TRN) now. This will also be sent to your email and mobile. Note down the TRN. You need to complete filling the part-B details within the next 15 days.

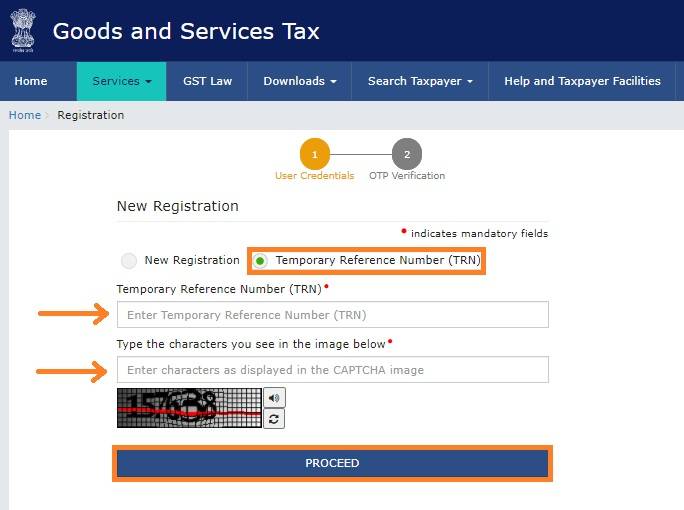
Step 5: Once again go to GST portal. Select the ‘New Registration’ tab.
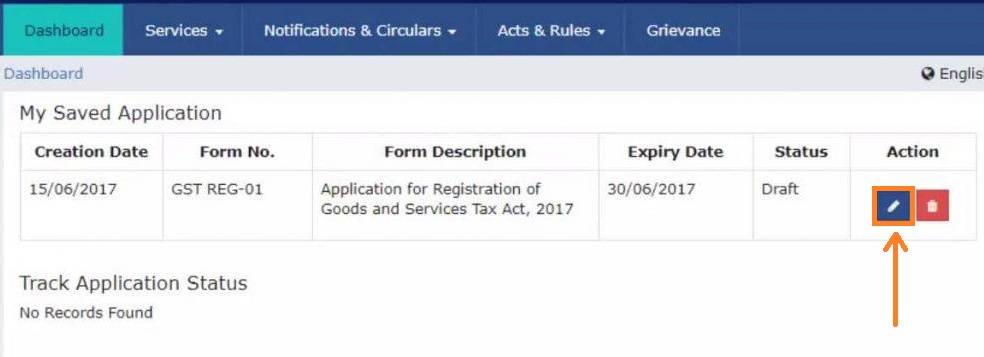
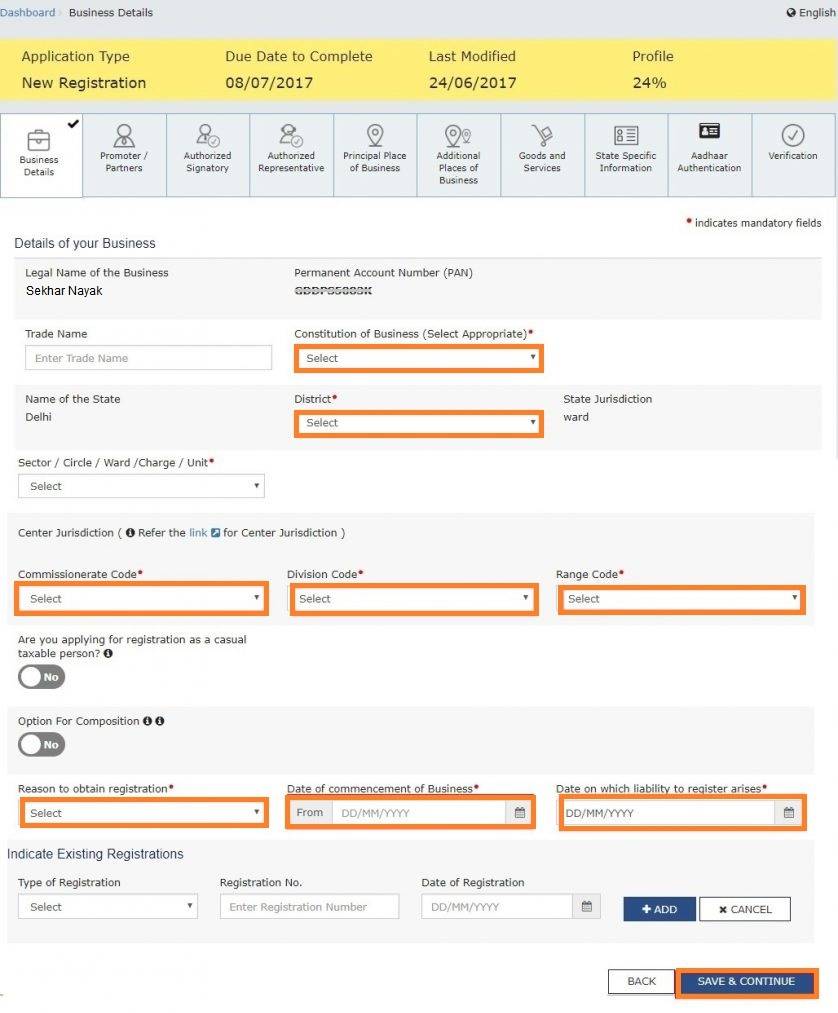
Step 9: Part B has 10 sections. Fill in all the details and submit appropriate documents. Recently, aadhaar authentication section was added and the bank account section was made non-mandatory. Here is the list of documents you need to keep handy while applying for GST registration-
- Photographs
- Constitution of the taxpayer
- Proof for the place of business
- Bank account details*
- Verification and aadhaar authentication, if chosen
* Bank account details are non-mandatory at the time of GST registration since 27th December 2018.
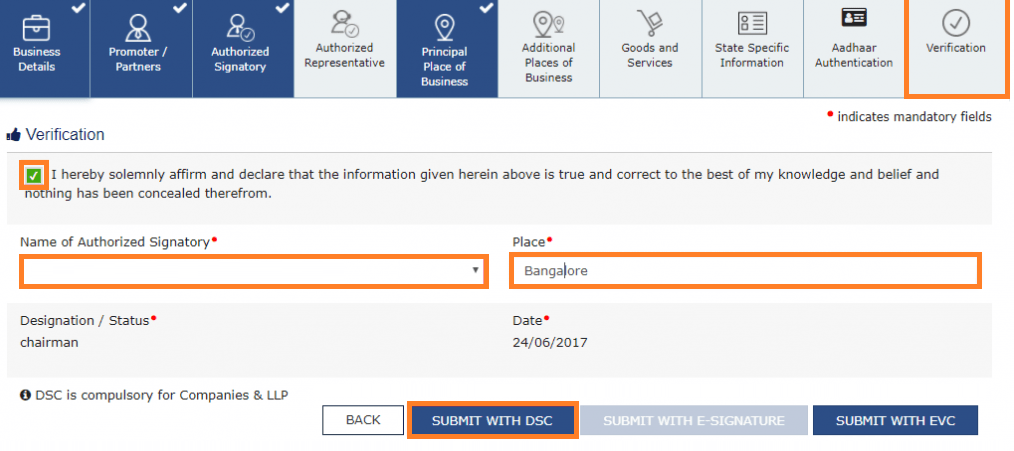
Step 10: Once all the details are filled in go to the Verification page. Tick on the declaration and submit the application using any of the following ways –
- Companies and LLPs must submit application using DSC
- Using e-Sign – OTP will be sent to Aadhaar registered number
- Using EVC – OTP will be sent to the registered mobile
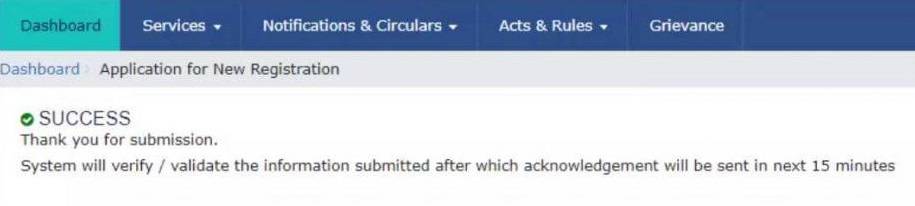
Step 11: A message is displayed on successful application and Application Reference Number(ARN) is sent to registered email and mobile. Note that if the authorised signatory chose to go for Aadhaar Authentication, then physical verification of premise or site will not be required to be done by the officer, except is specific cases. In such cases, the ARN will be generated right after that is complete.
Step 12: You can check the ARN status for your registration by entering the ARN in GST Portal.
For easier and hassle free GST Registration opt for Onlineideation GST Services. Click on the button below